
Welcome to the Keurig K10 Mini Manual! This guide provides essential information for safe and effective use of your compact single-serve coffee brewer. Explore setup, brewing, maintenance, and troubleshooting tips to enhance your coffee experience. Ensure to follow safety guidelines and recommended practices for optimal performance and longevity of your brewer.
1.1 Overview of the Keurig K10 Mini Brewer
The Keurig K10 Mini Brewer is a compact, single-serve coffee maker designed for convenience and simplicity. With its sleek design, it fits perfectly in small spaces while delivering a delicious cup of coffee quickly. It features a user-friendly interface, fast brewing times, and compatibility with K-Cup pods, making it ideal for coffee lovers seeking ease and variety in their daily routine.
1.2 Importance of Reading the Manual
Reading the Keurig K10 Mini Manual is crucial for understanding your brewer’s features, proper usage, and maintenance. It provides safety precautions, troubleshooting tips, and warranty details. Following the manual ensures optimal performance, prevents damage, and helps you make the most of your brewing experience. Refer to it regularly to address any questions or concerns about your Keurig K10 Mini Brewer.

Key Components of the Keurig K10 Mini
The Keurig K10 Mini features a compact design with essential components like the water reservoir, K-Cup holder, and control panel. Understanding these parts ensures proper usage and maintenance, while the sharp needles for piercing K-Cup pods highlight the importance of safety precautions outlined in the manual.
2.1 Exterior and Interior Parts
The Keurig K10 Mini features a sleek exterior with a compact design, including a water reservoir, control panel, and K-Cup holder. Inside, it houses the brewing mechanism and sharp needles that puncture the K-Cup pods. These components work together seamlessly to deliver a perfect cup of coffee. Always handle the needles with care and follow the manual’s safety guidelines for proper usage and maintenance. Regular cleaning ensures longevity and optimal performance.
2.2 Accessories Included in the Box
The Keurig K10 Mini comes with essential accessories for immediate use. Inside the box, you’ll find the brewer itself, a power cord, and a K-Cup pod holder. Additionally, the package includes a user manual detailing setup, brewing, and maintenance instructions. These accessories ensure a smooth unboxing and initial setup experience. Always refer to the manual for proper assembly and usage guidelines to activate your warranty and enjoy your brewing experience.
Setting Up Your Keurig K10 Mini Brewer
Unpacking and placing your Keurig K10 Mini is straightforward. Carefully unpack the brewer, position it on a flat surface, plug it in, and follow the manual for initial setup.
3.1 Unpacking and Placement
Begin by carefully unpacking your Keurig K10 Mini from its box. Ensure all accessories are included. Place the brewer on a stable, flat surface to ensure proper operation. Keep it away from water sources and heat to maintain safety and functionality. Proper placement is crucial for optimal performance and longevity of your coffee maker.
3.2 Initial Power-On and Setup
Plug in your Keurig K10 Mini and press the power button to activate it. Ensure the Add Water light is on, indicating the reservoir needs filling. Rinse the water reservoir thoroughly before filling it with fresh water. Perform a brief initial brew cycle without a K-Cup to prime the system. The brewer will automatically turn off after setup, ready for your first brew.
Brewing Your First Cup
Lift the handle, insert a K-Cup pod, and lower the handle gently. Select your preferred brew size using the button. Press Brew to start the cycle. The machine will puncture the pod and dispense the perfect cup. Once done, the brewer will automatically turn off, ensuring energy efficiency and safety.
4.1 Inserting the K-Cup Pod
To insert a K-Cup pod, lift the handle and align the pod with the chamber. Gently place it inside, ensuring it clicks into position. Avoid forcing or using multiple pods. Close the handle slowly and listen for the confirmation sound. Note: Two sharp needles will puncture the pod during brewing; handle with care to avoid injury. Always use Keurig-approved pods for optimal performance.
4.2 Selecting Brew Size and Starting the Brew Cycle
After inserting the K-Cup pod, choose your preferred brew size using the buttons on the control panel. Options typically range from 6 to 10 ounces. Once selected, press the brew button to start the cycle. The machine will puncture the pod and dispense hot water. The process is quick, usually taking 2-3 minutes. Ensure the cup is placed under the spout before brewing begins for a mess-free experience.
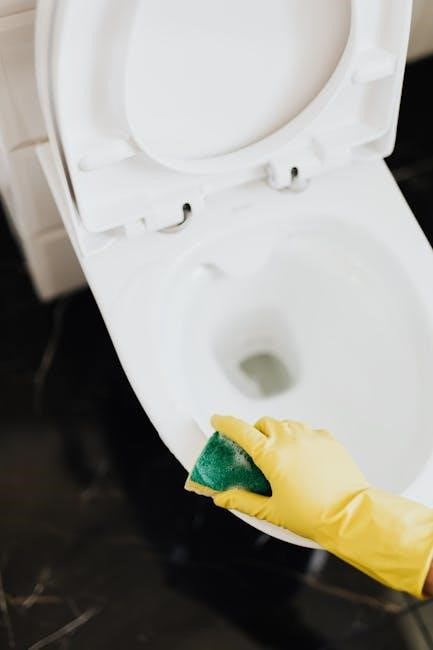
Cleaning and Maintenance Tips
Regularly wipe the exterior and empty the drip tray. Use a Keurig-approved descaler to remove mineral buildup. Clean the entrance and exit needles for optimal performance.
5.1 Daily Cleaning Routine
Start your daily routine by turning off and unplugging the brewer. Wipe the exterior with a damp cloth to remove splatters. Empty the drip tray and wash it with warm soapy water. Rinse thoroughly and dry to prevent mineral buildup. Regular cleaning ensures optimal performance and keeps your brewer in excellent condition for consistent coffee quality. Always refer to the manual for detailed steps.
5.2 Descaling the Brewer
Descaling your Keurig K10 Mini is crucial to remove mineral buildup and ensure optimal performance. Use a Keurig-approved descaling solution and follow the manual’s instructions. Run the brew cycle without a K-Cup to circulate the solution. Repeat if necessary, then rinse thoroughly with fresh water to eliminate any residual taste. Regular descaling prevents scaling issues and maintains your brewer’s efficiency and longevity.
Troubleshooting Common Issues
Address common problems like the brewer not turning on, K-Cup insertion issues, or water leaks. Refer to the manual for detailed solutions to restore functionality quickly and efficiently.
6.1 Brewer Not Turning On
If your Keurig K10 Mini brewer does not turn on, ensure the power cord is securely plugged into both the brewer and a functioning outlet. Check the circuit breaker or fuse box to confirm there are no electrical issues. Verify there is no damage to the power cord or brewer. Consult the manual for guidance on internal fuse replacement or contact Keurig support for assistance.
6.2 Issues with K-Cup Pod Insertion
If your Keurig K10 Mini has issues with K-Cup pod insertion, ensure the pod is aligned correctly under the puncture needles. Check that the lid is closed tightly and the pod is not wrinkled. Clean the entrance and exit needles regularly, as residue can cause insertion problems. Only use Keurig-approved K-Cup pods for compatibility. If issues persist, refer to the manual or contact Keurig support for assistance.
6.3 Leakage or Water Issues
If your Keurig K10 Mini experiences water leakage, check for loose connections or improper installation of the water reservoir. Ensure the reservoir is securely locked and the water level is not excessive. Regularly descale the brewer to remove mineral buildup, which can cause leaks. If issues persist, unplug the brewer and contact Keurig support for further assistance or replacement parts.
Understanding the Keurig K10 Mini Manual
The Keurig K10 Mini Manual is a comprehensive guide available for download from official sources, detailing setup, brewing, troubleshooting, and maintenance. It ensures safe and optimal use of your brewer.
7.1 Where to Download the Manual
The Keurig K10 Mini Manual is available for free download from the official Keurig website, trusted third-party sources, or retail platforms. Ensure to verify the source for authenticity. The manual is provided in PDF format, making it easy to access and print. Always download the latest version to get accurate and updated information for your brewer. Use official channels to avoid counterfeit manuals.
7.2 Navigating the Manual Sections
The Keurig K10 Mini Manual is structured for easy navigation. It begins with an introduction, followed by sections on components, setup, brewing, cleaning, and troubleshooting. Detailed diagrams and step-by-step instructions guide users through each process. The manual also includes dedicated sections for warranty, safety precautions, and energy efficiency features. Use the table of contents to quickly locate specific information, ensuring a seamless experience with your brewer.

Warranty and Customer Support
Register your Keurig K10 Mini to activate warranty benefits. For assistance, visit support.keurig.com or contact their customer service team for help and inquiries.
8.1 Registering Your Brewer
Registering your Keurig K10 Mini is essential to activate your warranty and receive special offers. Visit the official Keurig website or support.keurig.com to complete the process. Provide your brewer’s serial number and purchase details to ensure coverage and access exclusive benefits designed for Keurig owners.
8.2 Contacting Keurig Support
For assistance with your Keurig K10 Mini, visit the official Keurig support website. Here, you can find troubleshooting guides, maintenance tips, and contact options. Reach out to their customer service team for issues or inquiries. Ensure to have your brewer’s serial number ready for efficient support. Their team is available to help with any questions or concerns about your coffee maker.
Tips for Optimal Brewing Experience
Use Keurig-approved K-Cup pods for consistent flavor and to prevent damage. Clean your brewer regularly to ensure proper function and taste. Experiment with brew sizes and settings for your perfect cup.
9.1 Using Approved K-Cup Pods
Always use approved K-Cup pods to ensure optimal flavor and prevent damage to your Keurig K10 Mini. Unapproved pods may cause leakage or poor performance. Choose from a wide variety of flavors designed for Keurig brewers. Proper pod insertion and handling are crucial to avoid issues with the machine’s sharp needles. Refer to the manual for guidance on pod usage and maintenance.
9.2 Regular Maintenance for Longevity
Regular maintenance is key to extending the life of your Keurig K10 Mini. Descaling every 3-6 months with a Keurig-approved descaling solution prevents mineral buildup. Clean the brewer’s exterior and internal parts, such as the water reservoir and drip tray, frequently. Use a damp cloth for wiping surfaces and avoid harsh chemicals. Regularly check and clean the entrance and exit needles to ensure smooth operation and prevent clogs.

Energy Efficiency Features
The Keurig K10 Mini features energy-efficient designs, including an auto-off function that powers off the brewer after inactivity. It also includes energy-saving modes to reduce consumption, lowering utility bills while maintaining optimal brewing performance.
10.1 Auto-Off Function
The Keurig K10 Mini’s auto-off function automatically turns off the brewer after a period of inactivity, typically 90 seconds after the last brew. This feature ensures energy efficiency by preventing unnecessary power consumption when not in use. It also helps extend the lifespan of the brewer’s internal components. The auto-off feature is a convenient and eco-friendly addition to your daily coffee routine.
10.2 Energy-Saving Modes
The Keurig K10 Mini features energy-saving modes designed to minimize power consumption. These modes include a low-power standby option and an automatic shut-off after extended inactivity. By optimizing energy use, these modes help reduce your environmental footprint while maintaining the brewer’s performance. Utilize these settings to enjoy an eco-friendly brewing experience without compromising on convenience or quality.
Safety Precautions
Handle sharp needles with care and follow electrical safety guidelines. Always ensure the brewer is placed on a stable surface and keep children away. Follow all precautions for safe operation.
11.1 Handling Sharp Needles
The Keurig K10 Mini features two sharp needles that puncture the K-Cup pack during brewing. Avoid touching these needles, as they can cause injury. Always handle the brewer with care, especially when inserting or removing K-Cup pods. Use approved K-Cup pods to prevent needle damage. For cleaning, refer to the manual or Keurig’s support site for safe instructions. Keep children away from the brewer during operation.
11.2 Electrical Safety Guidelines
Ensure the Keurig K10 Mini is placed on a stable, heat-resistant surface away from water and flammable materials. Avoid exposing the brewer to moisture or submerging it in water. Use only the provided power cord and avoid damaged cords or plugs. Operate the brewer at the correct voltage to prevent electrical issues; Unplug the brewer when not in use or during cleaning. Always follow the manual’s electrical safety precautions to avoid hazards.
Upgrading or Modifying the Brewer
Upgrading or modifying the Keurig K10 Mini may void its warranty. Only use Keurig-approved accessories to maintain performance and safety. Unauthorized changes can cause damage.
12.1 Compatible Accessories
The Keurig K10 Mini supports various Keurig-approved accessories, including K-Cup pods, water filters, and reusable My K-Cup Universal coffee filters. Using non-approved items may affect performance or void the warranty. Always opt for Keurig-recommended products to ensure compatibility and maintain your brewer’s efficiency. These accessories enhance functionality and provide a seamless brewing experience.
12.2 Warranty Implications of Modifications
Modifying your Keurig K10 Mini beyond factory specifications may void its warranty. Only use Keurig-approved parts to maintain warranty coverage. Unauthorized alterations or tampering can lead to performance issues and invalidate your warranty. Always adhere to guidelines in the Keurig K10 Mini Manual to preserve your brewer’s warranty and ensure optimal functionality. Contact Keurig support for any inquiries regarding modifications or repairs.
13.1 Final Thoughts on Using the Keurig K10 Mini
The Keurig K10 Mini offers a perfect blend of convenience and quality, ideal for coffee lovers seeking a user-friendly brewing experience. Its compact design and fast brewing time make it a great addition to any kitchen. With proper care and adherence to the manual, it ensures long-lasting performance. Enjoy your favorite beverages with ease and satisfaction.
13.2 Encouragement to Follow Manual Guidelines
Consistently following the Keurig K10 Mini Manual ensures optimal performance, safety, and longevity of your brewer. Proper usage enhances your coffee experience, prevents issues, and extends the product’s lifespan. By adhering to the guidelines, you can troubleshoot effectively, maintain your brewer, and explore its features for a better experience. Start your journey to perfect coffee today and enjoy every cup to the fullest!
No Responses