Growing garlic is straightforward and satisfying. This guide covers timing, soil preparation, and techniques to ensure a successful harvest. Learn how to plant and care for garlic effectively.
Choosing the Right Garlic Variety
Choosing the right garlic variety is crucial for a successful harvest. Hardneck garlic varieties thrive in colder climates and offer robust, complex flavors, while softneck garlic is ideal for warmer regions and longer storage. Elephant garlic, though technically a leek, is mild and grows well in diverse conditions. Select varieties that suit your climate, desired flavor profile, and intended use. Consider factors like maturity rate, disease resistance, and bulb size when making your choice. Consult local nurseries or seed catalogs for regionally adapted options.
- Hardneck garlic: robust flavor, colder climates.
- Softneck garlic: sweeter, better storage.
- Elephant garlic: mild, versatile growth.
Understanding Garlic Growth and Climate Requirements
Garlic is a cool-season crop that thrives in temperate climates with well-drained soil and full sun. It requires 6-8 hours of sunlight daily and grows best in USDA zones 3-8. Garlic needs a cold period to form bulbs, making fall planting ideal in colder regions. In warmer climates, spring planting is preferred. Ensure soil pH is between 6.0-7.0 for optimal growth. Garlic is relatively drought-tolerant but performs best with consistent moisture during the bulb formation stage.
- Requires full sun and well-drained soil.
- Needs a cold period for bulb formation.
- Optimal growth in USDA zones 3-8.
- Soil pH should be 6.0-7.0.
Preparing the Soil for Garlic Planting
Ensure soil is well-drained and rich in organic matter. Test pH levels, aiming for 6.0-7.0. Add compost or aged manure to enhance fertility and structure.
Soil pH and Testing

Growing garlic requires a slightly acidic to neutral soil pH, ideally between 6.0 and 7.0. Testing your soil regularly ensures optimal growing conditions. Low pH can limit nutrient availability, while high pH may reduce sulfur uptake, affecting flavor. Use a soil testing kit or consult your local extension office for accurate results. Test before planting to allow time for adjustments. Proper pH balance promotes healthy root development and bulb formation, ensuring a robust harvest.
Improving Soil Structure and Fertility
To grow healthy garlic, enhance soil structure and fertility by incorporating organic matter like compost or aged manure. These additions improve drainage, aeration, and nutrient availability. Till the soil deeply to mix in amendments, ensuring a well-structured bed for root development. Additionally, planting green manures before garlic can enrich the soil with essential nutrients. Balanced soil fertility promotes robust growth, flavorful bulbs, and overall plant health, making it a critical step in successful garlic cultivation.
Adding Organic Matter Like Compost or Manure
Adding organic matter like compost or aged manure is essential for enriching the soil and promoting healthy garlic growth. Compost introduces beneficial microbes and nutrients, while manure provides slow-release fertility. Mix these materials into the soil before planting to improve drainage, aeration, and overall soil health. This step ensures strong root development and flavorful bulbs, making it a cornerstone of successful garlic cultivation. Properly aged organic matter is key to avoiding pathogens and ensuring optimal nutrient availability for your garlic crop.

When to Plant Garlic
Garlic is typically planted in fall or early spring. Fall planting allows roots to establish before winter, while spring planting starts after the ground thaws.
Planting Garlic in the Fall vs. Spring
Planting garlic in the fall allows roots to establish before winter, promoting larger bulbs at harvest. Spring planting is ideal for regions with shorter growing seasons. Fall planting typically yields better results, as the cloves develop roots over winter and shoots emerge in spring. However, spring planting can still succeed if done after the ground thaws. Both methods require proper soil preparation and spacing. Choose the timing based on your climate and desired harvest timeline for optimal success.
Understanding Your USDA Hardiness Zone for Timing
USDA Hardiness Zones determine the best time to plant garlic based on your region’s climate. Garlic typically thrives in zones 3-8. In cooler zones (4-5), plant garlic in early fall (September-October) to allow roots to establish before winter. In warmer zones (6-8), planting in late winter or early spring (February-March) is ideal. Check your zone to ensure garlic has enough time to mature before extreme heat or cold. Proper timing enhances bulb formation and overall yield, ensuring a successful harvest.
Planting Techniques for Garlic
Plant garlic cloves 3-4 inches deep, spaced 5-6 inches apart, pointy end up. Cover with soil and mulch. Water moderately and maintain even moisture during growth.
Breaking Down Garlic Bulbs into Cloves
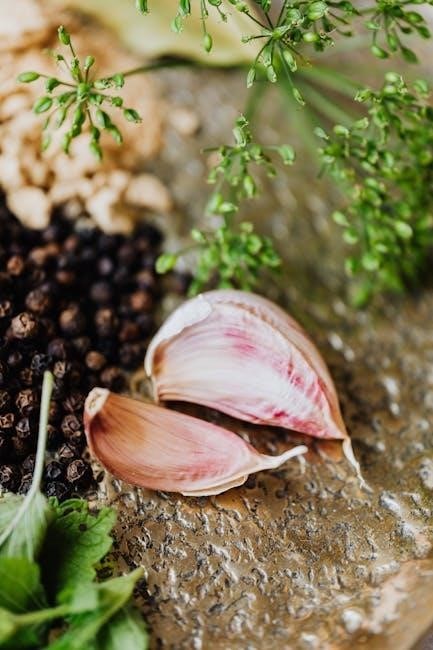
To prepare garlic for planting, gently break down the bulbs into individual cloves just before planting. Handle the cloves carefully to avoid damaging them. Leave the papery skin intact to protect the clove and prevent rot. Each clove should have a basal plate (the flat end) intact, as this is where roots and shoots emerge. Larger cloves typically produce bigger bulbs, so select healthy, firm cloves for planting. Avoid using cloves that show signs of mold or damage.
Proper Depth and Spacing for Planting Cloves
Plant garlic cloves 3-4 inches deep, with the pointed end facing upward. Space them 5-6 inches apart in well-draining soil. In areas with heavy frost, plant deeper (4-6 inches) to protect cloves. Use shallower planting (2-3 inches) in lighter soils or when using mulch. Proper spacing prevents overcrowding and promotes healthy bulb formation. Rows should be 12-18 inches apart to allow easy access for weeding and maintenance. Consistent spacing ensures even growth and maximizes yields.
Caring for Garlic Plants
Keep soil consistently moist during growth. Apply mulch to retain moisture and suppress weeds. Ensure full sun exposure for 6-8 hours daily. Feed with compost or aged manure.
Watering Requirements During Growth
Growing garlic requires consistent moisture, especially during bulb formation. Water lightly but frequently to keep the soil moist but not waterlogged. Overwatering can lead to rot and poor growth. Check soil regularly; if the top inch feels dry, it’s time to water. Avoid overhead watering to prevent fungal diseases. Mulch helps retain moisture and reduce evaporation. During hot or dry spells, ensure garlic plants receive about 1 inch of water per week. Proper watering supports healthy bulb development and flavorful harvests.
Using Mulch to Retain Moisture and Suppress Weeds
Mulching is a key step in garlic cultivation. Apply a 2-3 inch layer of organic mulch like straw, wood chips, or grass clippings around plants. This helps retain soil moisture, suppresses weed growth, and regulates soil temperature. Mulch also improves soil health by adding organic matter as it decomposes. Apply mulch after planting and replenish as needed. Avoid mulching too close to the plants to prevent rot. This simple practice ensures healthier growth and reduces maintenance, leading to a more successful garlic harvest.

Harvesting Garlic
Garlic harvesting involves carefully digging mature bulbs and curing them in a warm, dry place to enhance flavor and storage life. Proper curing ensures freshness.
Signs That Garlic is Ready to Harvest
Garlic is ready to harvest when the tops begin to yellow and fall over, signaling maturity. Carefully inspect the plants, as bulbs reach full size when about 5-6 leaves remain. Use a fork to gently loosen the soil around the bulbs, avoiding damage; Harvest when the soil is dry to prevent rot. Over-mature bulbs may split, reducing quality. Timing is crucial, typically mid-to-late summer. Proper harvesting ensures optimal flavor and storage.
Proper Techniques for Digging and Curing Garlic
To harvest garlic, carefully dig around the bulbs with a fork, avoiding damage. Once lifted, lay the plants in a warm, dry, well-ventilated area for curing. Keep the leaves attached to ensure proper drying. Curing takes 1-2 weeks, during which the bulbs develop their signature flavor and texture. After curing, trim the leaves and roots for storage. Proper techniques ensure long-lasting, high-quality garlic for future use. Store cured bulbs in a cool, dark place.

Storing Garlic for Longevity
Store garlic in a cool, dark, dry place to maintain freshness. Keep bulbs whole, in breathable containers, and avoid refrigeration. For best flavor, leave the papery wrapping intact.
Best Practices for Drying and Curing Garlic
After harvesting, lay garlic plants in a warm, dry, well-ventilated area for 1-2 weeks. Keep the leaves attached to ensure proper curing. Avoid direct sunlight, as it may cause discoloration. Store cured garlic in a cool, dark place with low humidity. Trim the roots and leaves before storage. Proper curing prevents rot and extends shelf life. Check regularly for signs of mold or damage. This process ensures flavorful, long-lasting garlic for year-round use.
Methods for Storing Garlic to Maintain Freshness
Store garlic in a cool, dry, dark place with good ventilation to prevent mold. Use paper bags or airtight containers to maintain humidity and freshness. Avoid refrigeration, as it can cause garlic to become bitter. For long-term storage, garlic can be braided into bunches and hung indoors. Regularly inspect stored garlic for signs of spoilage and remove any damaged cloves. Proper storage ensures garlic remains flavorful and fresh for several months, ready for use in various culinary dishes throughout the year.

No Responses